• Hello guest! Are you a Bearded Dragon enthusiast? If so we invite you to join our community and see what it has to offer. Our site is specifically designed for you and it's a great place for Beardie enthusiasts to meet online. Once you join you'll be able to post messages, upload pictures of your dragons and enclosures and have a great time with other Bearded Dragon enthusiasts. Sign up today!

Viv building idea

staylor

Bearded Dragon Egg
3 Year Member
1,000+ Post Club
Messages
1,948
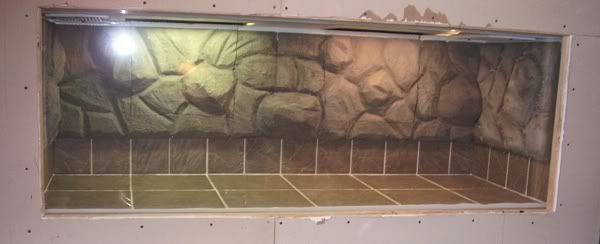
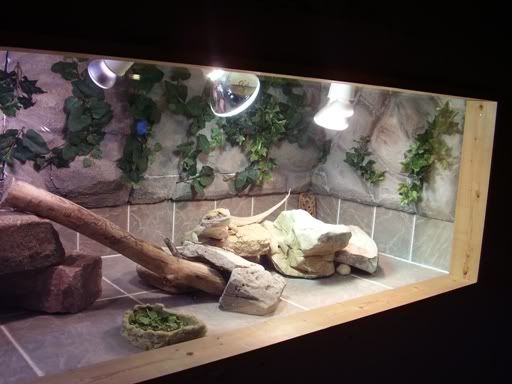
I was looking for plans on building a viv. I found this one, with a low build cost and very easy. Just thought I would share with you all for your future builds. I like this one with the exception of the sand and air vents. I am sure as it is built there are other things that I will change.

http://708designs.netfirms.com/customcage/customcage.htm
 

Craiger

Bearded Dragon Egg
3 Year Member
1,000+ Post Club
Messages
1,682
LOVE it! Nice plans. I've yet to read the entire page, yet, as I just glanced through (and the fact that one of my 18-year-old twins is wanting to take over the computer), but I wanted to give this little bit of input in case it helps.

It has to do with the fake rocks. Personally, I found that just siliconing two layers of insulation together (and mine were 2" thick instead of 1") made for carving the rocks directly out of the Styrofoam a lot easier. Not that it was two whole layers combined. Just small sections of the insulation glued in areas where I wanted the rock to look like it was bigger and protruding out further than that of the rest. Here, maybe a couple pics will help describe it better.

This is the insulation I purchased at Lowes for about the same price listed on that website ($8 a sheet). It's 2" thick, as I said, and like 8 feet long and 2 feet wide.
Styroandcaulk.jpg


A bit of carving and a couple "double thick" areas of insulation for raised rocks.
Lair23.jpg


And here's the result of carving those raised sections.
Lair25.jpg


Another view and another piece added.
Lair27.jpg


Then, everything carved, cemented (with a brown dye), then sealed. I used cement instead of grout. Seems to be holding up pretty well after three years.
Lair38.jpg


And this is the background with ivy added.
Lair57.jpg


I'll be going over all of this in my build thread, but thought I'd give you a heads-up, here, since it was being covered in that link. Again, VERY cool link. I'll talk more about it later when I get some time. For now, I'm being hovered over. LOL! Scholarship papers are calling!
 

staylor

Bearded Dragon Egg
3 Year Member
1,000+ Post Club
Messages
1,948
Thank you, I will keep all this in mind. First I have to find the dresser I am going to gut.

Scholarship papers are important...right now I am getting my family about 20k in debt with student loans because I was too lazy to try for scholarships. Back to school as an adult with a family equals no patients to look for scholarships.
 

egg 80

Bearded Dragon Egg
3 Year Member
Messages
237
great link staylor ive seen a few builds like that and they all end up lookin cool as.


craiger how did you cut the styrofoam i use a hot knife but missis goes mad lol and i end up in dog house

paul
 

Craiger

Bearded Dragon Egg
3 Year Member
1,000+ Post Club
Messages
1,682
egg 80 said:
craiger how did you cut the styrofoam i use a hot knife but missis goes mad lol and i end up in dog house

paul

I used a serrated knife found in my fishing knives. Actually worked really well. You can see it in this photo. Not the clearest, but might give you an idea of it's size.

Lair27.jpg
 

Craiger

Bearded Dragon Egg
3 Year Member
1,000+ Post Club
Messages
1,682
egg 80 said:
cheers craiger i might just have to give it a go


paul

Cool. If you do, be sure to let me know. I'm about ready to start another thread on my other viv. It's a stand alone.
 

Latest posts

Top