CarbonFiberSwan
Hatchling Dragon
- Messages
- 56
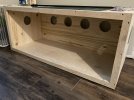
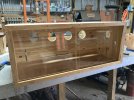
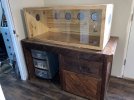
I saw a YouTube video that inspired me to build my own Beardie enclosure. I’ve still got a bit to do with it, but I have made good progress. I’ll be clear coating the inside to waterproof it for easy cleanup. I’m installing 2 sliding glass doors on the front. Then I’ll just need to install the lighting and accessories and it’ll be ready for Toothless.
I’ve said in previous posts that I’d be building a bigger enclosure for my little guy. Thought I’d give an update!
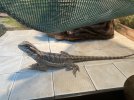
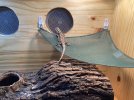
also, Toothless says hi.
the dimensions are:
4 feet x 20 inches x 20 inches (outside)
46.5 inches x 20 inches x 18.5 inches (inside)
the doors will take up some of that space, but I think this will be plenty big enough
I’ve said in previous posts that I’d be building a bigger enclosure for my little guy. Thought I’d give an update!
also, Toothless says hi.
the dimensions are:
4 feet x 20 inches x 20 inches (outside)
46.5 inches x 20 inches x 18.5 inches (inside)
the doors will take up some of that space, but I think this will be plenty big enough