- Messages
- 71
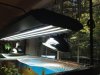
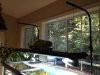
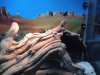
Some think I’m crazy, but I tore down a 10 year old well established planted tank for my new beardie. Here is a pic of the tank as it was setup before. It is an All Glass 120 gallon tank that is 4’x2’x2’

more info here: http://showcase.aquatic-gardeners.org/2006/show130.html
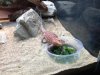
And here it is after a transformation to the dessert!
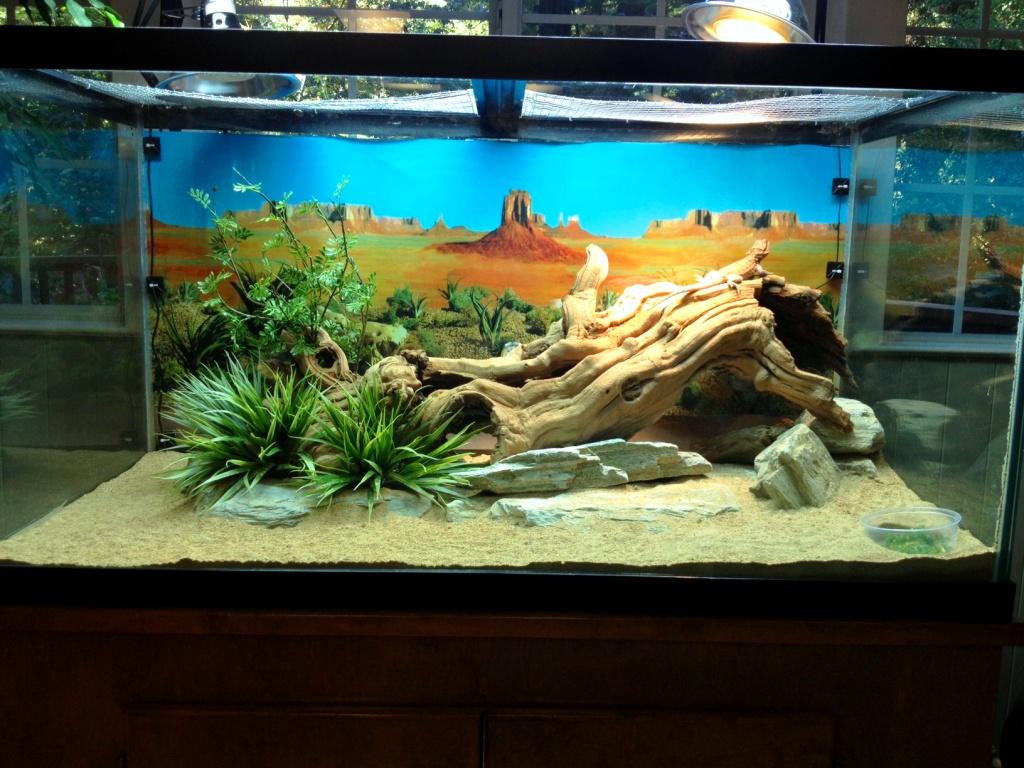
Branch is sandblasted grapevine from a company called “Castles for Reptiles” Met the owner at the Sacramento Reptile show. He had all kinds of stuff in all shapes and sizes and very reasonably priced.
The Rocks are from a local landscape supply company. The name of the rocks are “Dessert Cloud.” They were only 18 cents a pound. For $20 I took home more than enough to choose from. Scrubbed them down and soaked in a mild bleach solution to sterilize.
Plants are from a local store called “Michaels.” They sell all kinds of stuff for fake flower arrangements. Lot’s to choose from. Plants where rinsed in hot water and soaked in a mild bleach solution as well just to be safe.
For substrate I decided to go with “sunset gold” decomposed granite from the landscape supplier. I really like the DG because it comes in different colors and also packs down and holds it's for a little batter than sand- although it can be bit dusty until it settles down. The smallest they had was 1/4“ minus (meaning 1/4 size pieces and smaller) so I hand sifted out the larger pieces so what’s left is a very fine grained material. A reptile pooper scooper worked out perfect for this task. Once the DG was prepped it was placed in the oven in batches and baked at 400 degrees for 30 minutes. This was mostly to sterilize, but also removed any moisture that was still in the product. Extra material was prepped and stored for future use.
more info here: http://showcase.aquatic-gardeners.org/2006/show130.html
And here it is after a transformation to the dessert!
Branch is sandblasted grapevine from a company called “Castles for Reptiles” Met the owner at the Sacramento Reptile show. He had all kinds of stuff in all shapes and sizes and very reasonably priced.
The Rocks are from a local landscape supply company. The name of the rocks are “Dessert Cloud.” They were only 18 cents a pound. For $20 I took home more than enough to choose from. Scrubbed them down and soaked in a mild bleach solution to sterilize.
Plants are from a local store called “Michaels.” They sell all kinds of stuff for fake flower arrangements. Lot’s to choose from. Plants where rinsed in hot water and soaked in a mild bleach solution as well just to be safe.
For substrate I decided to go with “sunset gold” decomposed granite from the landscape supplier. I really like the DG because it comes in different colors and also packs down and holds it's for a little batter than sand- although it can be bit dusty until it settles down. The smallest they had was 1/4“ minus (meaning 1/4 size pieces and smaller) so I hand sifted out the larger pieces so what’s left is a very fine grained material. A reptile pooper scooper worked out perfect for this task. Once the DG was prepped it was placed in the oven in batches and baked at 400 degrees for 30 minutes. This was mostly to sterilize, but also removed any moisture that was still in the product. Extra material was prepped and stored for future use.

")