Hello guest! Are you a Bearded Dragon enthusiast? If so we invite you to join our community and see what it has to offer. Our site is specifically designed for you and it's a great place for Beardie enthusiasts to meet online. Once you join you'll be able to post messages, upload pictures of your dragons and enclosures and have a great time with other Bearded Dragon enthusiasts. Sign up today!
Same area it is in now. the uv light isnt very wide so it wont take up that much space on top of the tank. But it also will not be close enough to be effective on top of your tank. The dragon has to be able to get within 12 inches of the bulb.
Okay... these show both MVB and flood lights...
This is Gemini's enclosure... 4'L x 24"W x 49" H..
You can see how I have used a double fixture for both the MVB and the flood light... Quite effective... as this allows a series of different levels of distance so Gem can choose how close *14"* or how far *22"* he wants to be in relation to that MVB.
This is Orions.. again.. a double fixture. His enclosure was the first I built with my boy's help... 4' L x 24" w x 39" H
Does that help you out ? Mind you my enclosures were built with MVBs in mind....
Janie
Okay, I see how you did those.... but your tanks are built, mine is just a glass tank. And as that other person said, I should use one of those Repti-Sun long bulbs. What UVB bulb are you using? Because I see it's not long like those Repti-Suns.... Maybe if I post a picture you could have a good idea of how to help me to set everything up?
Janies setups are with Mercury Vapor Bulbs. it is a single bulb that ouputs both heat and UV light together. Your tank is large enough to use one if you want to go that route. My personal suggestion would be the Trex Active Heat you can get them at pet mountain for a lil over 40 bux comes in 100watt 160 watt and 240 watt. Id say you would probably want the 160 for the size of your tank. And the current height of your basking site would work perfect with this bulb. You will, however, need a ceramic light fixture with 10" dome light for the bulb. here is a link to the bulb on petmountain http://www.petmountain.com/product/reptile-mercury-vapor/503619/t-rex-active-uv-heat-flood-spot-lamps.html
A glass tank and they're asking for repti suns. Being unsure of the MVB's, this cirumstance is not the best to experiment with first time around. Agreed guys? Go with the repti sun
Brian,
describe the tank with the 11 year old in my dining room. 24 inch fixture, ceramic base, on a "slap board", no screen top. Simple fix.
the boards are 1 x 4 side by side, so it's 8 inches wide. You need to cover the boards with flashing so as to properly reflect the light (no waisted rays).
cut a circle hole in the top.
Just mount and wire the fluorescent fixture into the box, it should have it's own cord and plug. Then mount a ceramic fixture on whichever side you chose to have your basking light on. Attach the power cord for this fixture using wire nuts as they are safe and secure.
Building a lid like this will take up some of that space you are having an issue with and allow your dragon to get closer to the recommended minimum of 12 inches from the repti-sun
Anyway, if I go along with the Mercury Vapor Bulb, you said I need the ceramic fixture thing...
is this it? http://www.reptilesupply.com/images/27001.jpg
That's the lamp I'm using, and I'm wondering if it's the 'ceramic' one.
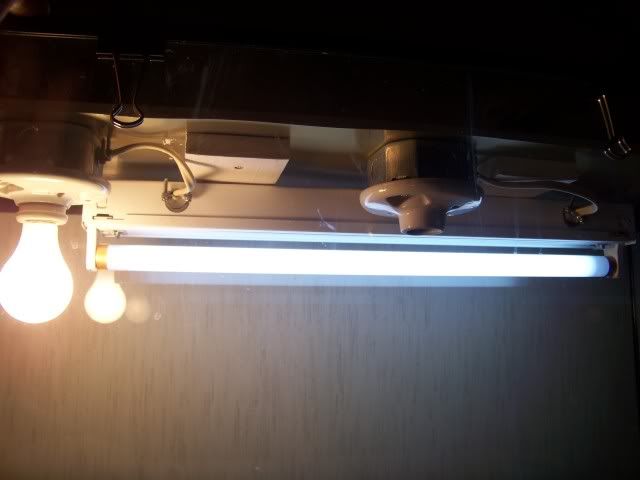
Here's the lighting i have set up that Brian explained.
that is a 24 inch florescent fixture from Lowes, and 2 ceramic light fixtures for regular house bulbs from Lowes. Mounted to a 1 x 8 or (2) 1 x 4 pieces
This kinda gives you an idea of the wiring set up.